
Introduction to Camtasia Studio: Unleash Your Video Editing and Screen Recording Skills
Camtasia Studio is a powerful software that empowers you to create professional-quality videos by combining video editing and screen recording capabilities. Whether you’re a content creator, educator, or business professional, Camtasia Studio provides a user-friendly interface and a wide range of features to bring your ideas to life.
With Camtasia Studio, you can record your screen to capture tutorials, presentations, or demonstrations with ease. Whether you’re showcasing software applications, creating online courses, or sharing your expertise, the screen recording feature allows you to capture every detail of your screen activity.
But Camtasia Studio isn’t just limited to screen recording. It also provides powerful video editing tools that enable you to polish your recordings and create compelling videos. From trimming and cutting footage to adding transitions, effects, and annotations, Camtasia Studio offers a comprehensive set of editing features to make your videos visually engaging and professional.
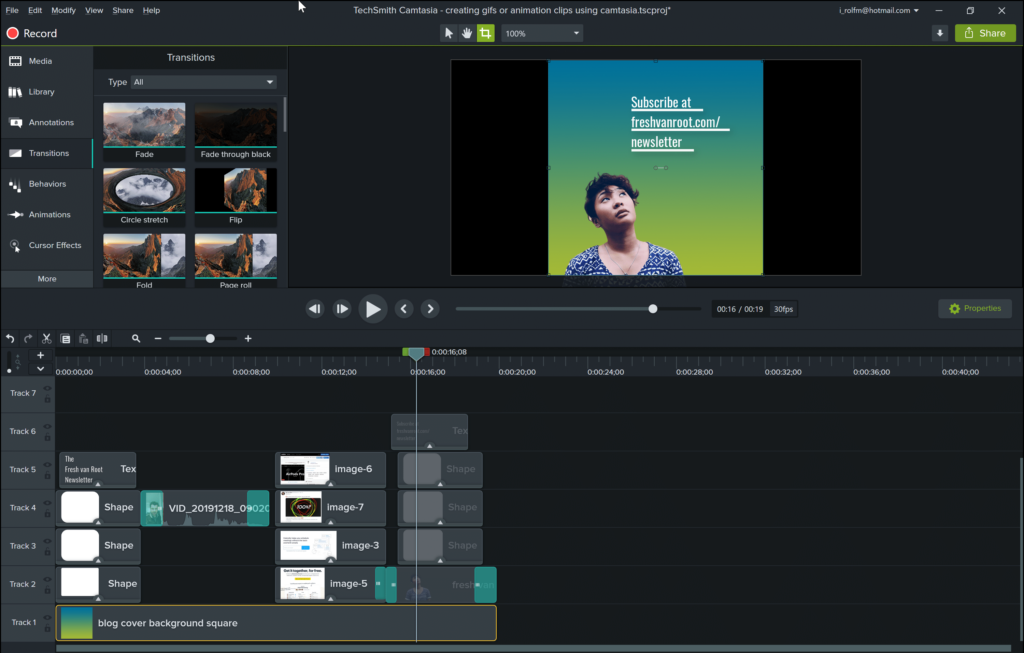
One of the highlights of Camtasia Studio is its intuitive and user-friendly interface, designed to streamline your video editing workflow. The timeline allows you to easily arrange and synchronize your video and audio tracks, while the preview window gives you a real-time view of your edits. With drag-and-drop functionality and a wide range of pre-built assets, you can quickly create videos without any prior editing experience.
Camtasia Studio also provides a library of royalty-free music, sound effects, and customizable templates to enhance your videos. You can add captions, callouts, and animations to highlight key points, and even include quizzes or interactive elements to engage your audience.
Once you’ve completed your video masterpiece, Camtasia Studio offers various export options, allowing you to save your videos in different formats suitable for sharing on different platforms. Whether you want to publish your videos on YouTube, share them on social media, or embed them in your website, Camtasia Studio provides the flexibility to reach your audience wherever they may be.
In the following sections, we will delve deeper into the features and functionalities of Camtasia Studio, providing step-by-step guides, tips, and tricks to help you unleash your video editing and screen recording skills. Get ready to take your content creation to the next level with Camtasia Studio.
Exploring the Features of Camtasia Studio: Create Professional-Quality Videos
Camtasia Studio is a powerful video editing software that offers a wide range of features to help you create professional-quality videos. Whether you’re a content creator, educator, or business professional, Camtasia Studio provides the tools you need to bring your ideas to life and captivate your audience. Let’s dive into the key features that make Camtasia Studio a go-to choice for video editing:
Screen Recording:
Camtasia Studio allows you to capture your screen activity with ease. Whether you want to create software tutorials, record presentations, or demonstrate processes, the screen recording feature lets you capture every detail of your screen with crystal clarity. You can choose to record the entire screen or select specific areas, giving you full control over what you capture.
Video Editing:
Camtasia Studio offers a comprehensive set of video editing tools to help you polish your recordings and create visually appealing videos. You can trim and cut footage, rearrange clips on the timeline, and seamlessly merge multiple recordings. The software also provides advanced features like multi-track editing, allowing you to work with multiple video and audio tracks simultaneously.
Annotations and Callouts:
Enhance your videos with annotations and callouts to highlight important information or guide your viewers’ attention. Camtasia Studio offers a variety of annotations, such as arrows, shapes, and text boxes, which you can easily customize to match your branding or personal style. These tools enable you to add visual elements that enhance the clarity and impact of your content.
Transitions and Effects:
Camtasia Studio provides a wide range of transitions and effects to add visual interest and professionalism to your videos. You can choose from various transition styles to smoothly blend clips together, and apply effects like color correction, blur, and animations to enhance the visual appeal of your footage. These features help you create seamless and captivating video presentations.
Audio Editing:
Audio plays a crucial role in video production, and Camtasia Studio offers tools to ensure your audio is clear and engaging. You can easily adjust audio levels, remove background noise, and add background music or voiceover tracks. The software also provides audio effects and equalization options to further enhance the quality of your audio.
Media Library:
Camtasia Studio includes a media library that provides access to a wide range of pre-built assets, including royalty-free music, sound effects, video clips, and customizable templates. This extensive library enables you to quickly enhance your videos with professional elements, saving you time and effort in sourcing external media.
Quizzing and Interactive Elements:
If you’re creating educational or training content, Camtasia Studio offers interactive features to engage your viewers. You can easily add quizzes, surveys, and interactive elements to your videos, making them more interactive and impactful. These features help you create engaging and immersive learning experiences.
Export and Sharing Options:
Once you’ve completed your video masterpiece, Camtasia Studio provides various export options to suit your needs. You can save your videos in different formats, including popular video file formats and optimized formats for specific platforms like YouTube or mobile devices. The software also allows you to directly share your videos to online platforms, making it easy to distribute your content.
Camtasia Studio empowers you to create professional-quality videos with its robust set of features and intuitive interface. Whether you’re a beginner or an experienced video editor, Camtasia Studio provides the tools you need to bring your vision to life. In the following sections, we will explore these features in more detail, providing practical tips and insights to help you create stunning videos with Camtasia Studio. Get ready to take your video editing skills to new heights!
Getting Started with Camtasia Studio: Installation and Setup Guide
Camtasia Studio is a powerful video editing and screen recording software that allows you to create professional-quality videos. To get started with Camtasia Studio, follow this step-by-step installation and setup guide:
Step 1: Download Camtasia Studio:
Visit the official TechSmith website or trusted software download platforms to download the latest version of Camtasia Studio. Ensure that you choose the appropriate version for your operating system (Windows or macOS).
Step 2: Run the Installer:
Locate the downloaded installer file and double-click to run it. Follow the on-screen instructions to begin the installation process. Accept the license agreement and select the desired installation location.
Step 3: Customize Installation Options:
During the installation, you may be presented with options to customize the installation. You can choose the desired language, select additional components, and configure file associations. Make your selections based on your preferences and click “Next” or “Install” to proceed.
Step 4: Wait for the Installation to Complete:
The installer will now extract and install the necessary files for Camtasia Studio. Wait for the installation process to complete. It may take a few minutes depending on your system’s speed.
Step 5: Launch Camtasia Studio:
Once the installation is complete, you can launch Camtasia Studio by finding the program in your Start menu (Windows) or Applications folder (macOS). Double-click on the Camtasia Studio icon to open the software.
Step 6: Activate Camtasia Studio (if required):
If you have a valid license or a trial version, you may be prompted to enter your license key or sign in with your TechSmith account. Follow the on-screen instructions to activate Camtasia Studio.
Step 7: Set Up Preferences:
When you first launch Camtasia Studio, you will have the option to configure your preferences. You can choose the default project settings, video and audio settings, and other preferences based on your requirements. Take the time to customize these settings to align with your workflow.
Step 8: Explore the User Interface:
Familiarize yourself with the Camtasia Studio user interface. Take a moment to explore the various panels, such as the Media Bin, Library, and Timeline. Familiarize yourself with the location of key tools and options. This will help you navigate and work efficiently within the software.
Congratulations! You have successfully installed and set up Camtasia Studio. You are now ready to start creating amazing videos using the powerful features and capabilities of the software. In the following sections, we will delve deeper into specific features and techniques to help you unleash your creativity and maximize your video editing and screen recording skills with Camtasia Studio. Get ready to bring your ideas to life!
Recording and Editing Screen Capture with Camtasia Studio: Mastering the Basics
Camtasia Studio offers powerful screen recording and editing capabilities that allow you to create professional and engaging videos. In this guide, we will walk you through the process of recording and editing screen capture with Camtasia Studio, helping you master the basics of this essential feature.
Step 1: Launch Camtasia Studio:
Open Camtasia Studio on your computer. Ensure that you have your desired screen or application ready to be recorded.
Step 2: Set up the Recording Area:
In Camtasia Studio, click on the “Record” button located on the top toolbar. A recording toolbar will appear on your screen. Before you start recording, choose the desired area to capture by adjusting the recording frame. You can either select the full screen or choose a custom region by clicking and dragging the frame.
Step 3: Configure Recording Options:
Click on the drop-down arrow next to the “Record” button to access recording options. Here, you can configure settings such as audio sources, webcam inclusion, cursor effects, and microphone input. Customize these options based on your recording requirements.
Step 4: Start the Recording:
Once you have set up your recording preferences, click the “Record” button to start the screen capture. You can also use hotkeys like F9 (Windows) or Command+Shift+2 (macOS) to initiate the recording. A countdown will appear, giving you a few seconds to prepare. During the recording, the recording toolbar will be minimized, allowing you to focus on your screen activity.
Step 5: Pause and Resume Recording (Optional):
While recording, you can pause and resume the screen capture as needed. Use the designated hotkey (default: F9 on Windows, Command+Shift+2 on macOS) to pause the recording. To resume, press the hotkey again. This feature allows you to capture specific segments and avoid unnecessary content.
Step 6: Stop the Recording:
Once you have finished capturing your screen activity, click the “Stop” button on the recording toolbar or use the designated hotkey (default: F10 on Windows, Command+Shift+3 on macOS) to end the recording. Camtasia Studio will automatically open the recorded video in the editor for further editing.
Step 7: Edit Your Screen Recording:
In the Camtasia Studio editor, you can trim the beginning and end of the recording, remove any unwanted sections, add annotations, transitions, and effects, and enhance the overall visual and audio quality. Utilize the various editing tools and features available to craft a polished and professional video.
Step 8: Save and Export Your Video:
Once you have completed the editing process, click on the “File” menu and select “Save” or “Save As” to save your project file. To export your video in a specific format, go to the “Share” menu and choose the desired output option. Camtasia Studio offers various export presets suitable for different platforms, including YouTube, Vimeo, and mobile devices.
Congratulations! You have mastered the basics of recording and editing screen capture with Camtasia Studio. With this powerful feature, you can create compelling video tutorials, software demonstrations, online courses, and much more. Experiment with different recording techniques, explore advanced editing tools, and continue to refine your video creation skills using Camtasia Studio.
Enhancing Your Videos with Effects and Transitions in Camtasia Studio
Camtasia Studio offers a wide array of effects and transitions to elevate the visual appeal and professionalism of your videos. In this guide, we will explore how you can enhance your videos using these powerful features.
Effects:
Camtasia Studio provides a range of effects that you can apply to your video clips. These effects can help you enhance colors, adjust brightness and contrast, add visual filters, and more. To apply an effect, select the desired video clip on the timeline, navigate to the “Visual Properties” tab in the properties panel, and choose from the available effects. Experiment with different effects to achieve the desired visual style and mood for your video.
Annotations and Callouts:
Annotations and callouts are powerful tools for emphasizing key points or providing additional information in your videos. Camtasia Studio offers a variety of annotation and callout options, such as arrows, shapes, text boxes, and highlighters. You can easily add these elements to specific frames or sections of your video by selecting the desired annotation from the library and placing it on the canvas. Customize the appearance and timing of the annotations to align with your video content.
Transitions:
Transitions help create smooth and seamless visual transitions between video clips. Camtasia Studio provides a wide range of transitions, including fades, dissolves, wipes, and more. To apply a transition, select the desired clip on the timeline, go to the “Transitions” tab, and choose the desired transition effect. Drag and drop the transition between two video clips to create a smooth transition between them. Adjust the duration and timing of the transition to achieve the desired effect.
Cursor Effects:
When recording screencasts or software demonstrations, it’s essential to ensure that your viewers can easily follow your cursor movements. Camtasia Studio offers cursor effects that can highlight and emphasize mouse clicks, cursor movements, and keystrokes. You can choose from various visual styles and customize the appearance of the cursor effects to make them more visually appealing and informative.
Captions and Subtitles:
Captions and subtitles are valuable additions to videos, especially for accessibility or language localization purposes. Camtasia Studio allows you to easily add captions or subtitles to your videos. You can import caption files, manually type the captions, or use automatic speech-to-text conversion. Customize the font, size, color, and positioning of the captions to ensure they are legible and visually pleasing.
Audio Effects:
In addition to enhancing the visual aspects of your videos, Camtasia Studio offers audio effects to improve the audio quality and overall experience. You can adjust audio levels, remove background noise, and apply equalization or audio effects to make the audio more clear and professional. Ensure that the audio complements the visual elements and creates a well-rounded viewing experience.
Interactive Hotspots:
Camtasia Studio allows you to add interactive hotspots to your videos. These hotspots can be used to create clickable areas that provide additional information, navigate to specific sections, or trigger specific actions. By adding interactive elements, you can engage your viewers and make your videos more interactive and immersive.
Remember, when using effects and transitions, it’s essential to strike a balance and avoid overusing them. Use them purposefully and strategically to enhance your videos without distracting from the main content.
By utilizing the effects and transitions available in Camtasia Studio, you can take your videos to the next level, making them visually appealing, engaging, and professional. Experiment with different options, customize the effects to fit your video’s style, and let your creativity shine. Your enhanced videos will captivate and impress your viewers, making your content stand out.
Conclusion
Camtasia Studio offers a comprehensive suite of tools and features that empower you to create professional-quality videos. Whether you’re a content creator, educator, or business professional, Camtasia Studio provides a user-friendly interface and powerful functionality to bring your ideas to life.
With Camtasia Studio, you can record your screen, capture video footage, edit and enhance your recordings, and produce polished videos that captivate your audience. The software’s intuitive interface makes it easy to navigate and master, even for those new to video editing.
Camtasia Studio’s wide range of features, such as effects, transitions, annotations, and callouts, allow you to customize your videos, adding visual appeal and enhancing the storytelling aspect. The ability to edit audio, add captions and subtitles, and incorporate interactive elements further enriches the viewer experience.
Whether you’re creating tutorials, training videos, marketing materials, or educational content, Camtasia Studio provides the tools you need to deliver high-quality videos that engage and inform your audience. The software also offers various export options, enabling you to share your videos on different platforms and devices seamlessly.
In addition to its features, Camtasia Studio offers extensive resources and support, including tutorials, documentation, and a vibrant community of users. This ensures that you have access to the knowledge and assistance you need to make the most of the software’s capabilities.
By using Camtasia Studio, you can unleash your creativity, enhance your video production skills, and produce compelling videos that make an impact. Whether you’re a beginner or an experienced video editor, Camtasia Studio provides the tools and flexibility to bring your vision to life.
So, why wait? Start exploring the world of video creation with Camtasia Studio and let your ideas shine on the screen. Elevate your video content, engage your viewers, and leave a lasting impression with the power of Camtasia Studio at your fingertips.