
Introduction to Blender: Unleash Your Creativity with this Powerful 3D Software
Blender is a versatile and powerful 3D software that empowers creators and artists to bring their ideas to life in stunning detail. Whether you’re a beginner or a seasoned professional, Blender provides a comprehensive suite of tools and features to unlock your creative potential.
With Blender, you can create intricate 3D models, design captivating animations, and produce breathtaking visual effects. Its intuitive interface, extensive functionality, and open-source nature make it a favorite among artists, animators, game developers, and visual effects professionals worldwide.
In this introduction to Blender, we’ll explore the features and capabilities that make it an indispensable tool for 3D creation. From modeling and sculpting to rendering and animation, Blender offers a seamless and efficient workflow that allows you to unleash your creativity and bring your imagination to life.
Whether you’re interested in creating stunning visual effects, designing characters and environments for games, or producing photorealistic renders, Blender provides the tools and flexibility to turn your ideas into reality.
In the following sections, we’ll delve deeper into the various aspects of Blender, including installation and setup, navigating the user-friendly interface, mastering different techniques, and exploring the vast possibilities this powerful 3D software has to offer.
Get ready to embark on an exciting journey of 3D creation with Blender. Let your creativity soar and discover the endless possibilities that await you in the world of Blender.
Features and Capabilities of Blender: The All-in-One 3D Creation Suite
Blender is not just another 3D software; it’s a comprehensive and powerful 3D creation suite that offers a wide range of features and capabilities. From modeling and animation to rendering and visual effects, Blender provides all the tools you need to bring your creative vision to life. Let’s explore some of the standout features and capabilities of Blender:
Modeling Tools: Blender offers a robust set of modeling tools that allow you to create complex 3D models with precision and ease. Whether you’re sculpting organic shapes or designing intricate mechanical objects, Blender’s modeling tools give you full control over every detail.
Animation and Rigging: With Blender, you can bring your creations to life through animation. It provides a comprehensive set of animation tools, including keyframing, rigging, and character animation. Create dynamic characters, realistic movements, and captivating visual storytelling.
VFX and Simulation: Blender excels in visual effects and simulation capabilities. It features a powerful particle system for creating realistic simulations of fluids, smoke, fire, and more. You can also use Blender’s physics engine for dynamic simulations and create stunning visual effects.
Rendering Engine: Blender comes with its own advanced rendering engine called Cycles. It offers photorealistic rendering capabilities, allowing you to create lifelike and high-quality visuals. Additionally, Blender supports GPU rendering, which significantly speeds up rendering times.
Compositing and Video Editing: Blender includes a versatile compositing editor that allows you to combine multiple layers, add effects, and fine-tune your final output. It also offers a video editor with basic editing features, making it a complete solution for post-production tasks.
Python Scripting and Add-ons: Blender is highly extensible and supports Python scripting. This opens up endless possibilities for customization and automation. You can create your own tools and workflows or take advantage of the vast library of community-developed add-ons.
Game Development: Blender is a popular choice for game development due to its comprehensive toolset and compatibility with various game engines. You can create 3D assets, design game environments, and even develop interactive experiences using Blender’s game engine.
Open-Source and Community-Driven: Blender is an open-source software, which means it is developed and maintained by a dedicated community of artists, developers, and enthusiasts. This vibrant community ensures constant improvement, updates, and a wealth of learning resources.
Blender’s extensive features and capabilities make it an all-in-one solution for 3D creation. Whether you’re a hobbyist, a professional artist, or working on a big production, Blender provides the tools and flexibility to turn your creative ideas into reality. Explore the vast possibilities of Blender and unleash your creativity like never before.
In the following sections, we’ll dive deeper into the practical usage, tips, and tricks of Blender, helping you make the most of its features and capabilities in your 3D projects.
Getting Started with Blender: Installation and Setup Guide
If you’re ready to embark on your journey with Blender, this installation and setup guide will walk you through the process step by step. Let’s get started:
Step 1: Download Blender:
Visit the official Blender website (www.blender.org) and navigate to the “Download” section. Choose the appropriate version of Blender for your operating system (Windows, macOS, or Linux) and click on the download link.
Step 2: Run the Installer:
Once the download is complete, locate the installer file and double-click on it to run the installation process. Follow the on-screen prompts to proceed.
Step 3: Choose Installation Options:
During the installation, you’ll be presented with various options to customize your Blender installation. You can choose the installation location, shortcuts, and file associations according to your preferences. Make your selections and click “Next” to continue.
Step 4: Start the Installation:
After confirming your installation options, click on the “Install” button to begin the installation process. Blender will be installed on your computer, which may take a few minutes to complete.
Step 5: Launch Blender:
Once the installation is finished, you can launch Blender by locating the program icon on your desktop or in the Start Menu (Windows) or Applications folder (macOS). Double-click on the icon to start Blender.
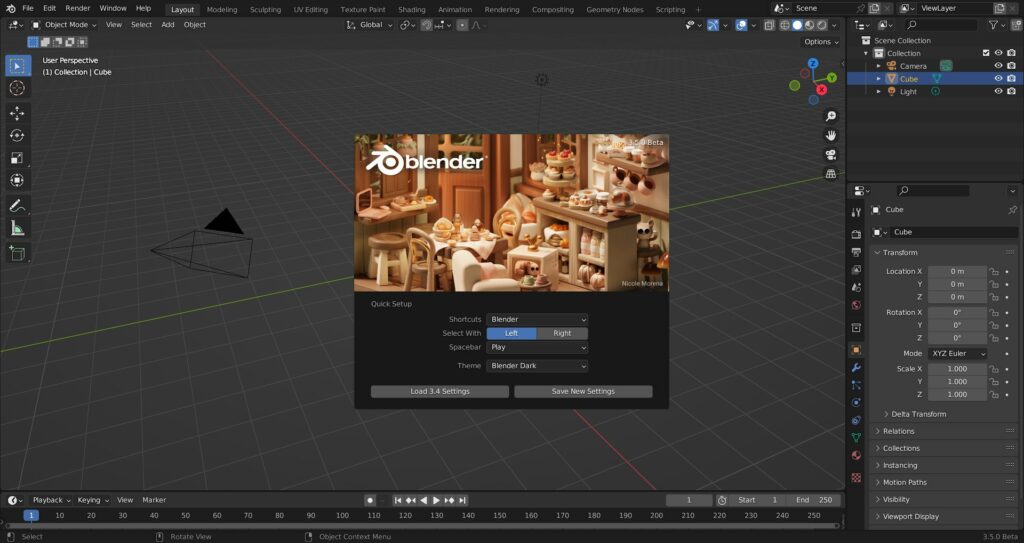
Step 6: Configure Preferences:
Upon launching Blender for the first time, you’ll be prompted to configure some preferences. This includes choosing the interface layout (such as “Industry Compatible” or “Animation”), setting up input preferences, and selecting other options based on your workflow. Adjust the preferences to your liking and click “Save Preferences” to continue.
Step 7: Explore the Interface:
Blender’s interface may appear complex at first, but don’t worry! Take some time to familiarize yourself with the various panels, menus, and tools. Blender offers a customizable interface, allowing you to arrange and personalize the layout according to your needs. Experiment with different arrangements and workflows to find what works best for you.
Step 8: Access Learning Resources:
As you start your Blender journey, it’s helpful to access learning resources to expand your knowledge and skills. Visit the official Blender website for tutorials, documentation, and the vibrant Blender community. You can also find numerous tutorials, courses, and forums online to help you learn and grow with Blender.
Congratulations! You have successfully installed Blender and are ready to start creating in the world of 3D. Take your time to explore the various features, experiment with different tools, and immerse yourself in the endless possibilities of Blender.
In the following sections, we will delve deeper into the practical usage of Blender, covering topics such as navigating the interface, modeling, animation, rendering, and more. Get ready to unleash your creativity and bring your ideas to life with Blender!
Navigating the Blender Interface: A User-Friendly Approach to 3D Design
Blender’s interface may seem overwhelming at first, but fear not! With a user-friendly design and a bit of guidance, you’ll quickly become comfortable navigating the various elements of Blender’s interface. Let’s explore the key components and features that will help you navigate Blender like a pro:
Editor Layout:
Blender’s interface is divided into multiple editors or windows, each serving a specific purpose. The main editors include the 3D Viewport, Outliner, Properties, and Timeline. You can customize the layout by dragging and resizing editors according to your preferences. Experiment with different layouts to find the one that suits your workflow.
3D Viewport:
The 3D Viewport is where you’ll spend a significant amount of time working on your 3D designs. It displays your 3D models and scenes from different perspectives. Use the middle mouse button to navigate in the viewport: hold and drag to rotate the view, scroll to zoom in and out, and press Shift while scrolling to pan the view.
Object Interaction:
In Blender, objects are the building blocks of your 3D scene. You can interact with objects in the 3D Viewport using the right-click or left-click select method (depending on your preference). Right-click to select an object, and left-click to perform actions such as moving, rotating, and scaling.
Editors and Panels:
Blender offers various editors and panels that provide access to different tools and functionalities. These include the Properties panel, where you can adjust object properties and settings, and the Outliner, which displays the hierarchy and organization of objects in your scene. Experiment with different editors to access the tools and features you need for your projects.
Keyboard Shortcuts:
Blender is known for its extensive use of keyboard shortcuts, which can greatly speed up your workflow. Take some time to familiarize yourself with commonly used shortcuts, such as G for grab (move), R for rotate, S for scale, and Tab to switch between object and edit modes. The more shortcuts you learn, the more efficient and fluid your work in Blender will become.
Menu Bar and Tool Shelf:
Blender’s Menu Bar at the top provides access to various menus and commands, allowing you to perform a wide range of actions. Additionally, the Tool Shelf on the left side of the interface contains context-sensitive tools related to the active editor or selected object. Explore the menus and tool options to discover the wealth of features Blender offers.
Help and Documentation:
Blender has a vast community of users and resources to help you navigate the interface and learn new techniques. The Blender manual, accessible from the Help menu, provides detailed documentation on every aspect of Blender. Online tutorials, forums, and video tutorials are also valuable resources for learning and mastering Blender.
Remember, practice makes perfect. As you spend more time exploring Blender’s interface and working on your projects, you’ll become more comfortable and proficient with its navigation. Don’t hesitate to experiment, ask questions, and seek out resources to enhance your understanding of Blender’s interface and unleash your creativity in 3D design.
In the following sections, we will delve deeper into various aspects of Blender, including modeling, animation, rendering, and more, empowering you to take full advantage of Blender’s powerful features and create stunning 3D designs.
Modeling and Sculpting in Blender: Bring Your Ideas to Life in 3D
Blender provides a robust set of modeling and sculpting tools that allow you to shape and mold your ideas into 3D creations. Whether you’re designing characters, environments, or objects, Blender’s modeling and sculpting features empower you to bring your vision to life. Let’s explore how you can unleash your creativity through modeling and sculpting in Blender:
Mesh Modeling:
Blender’s mesh modeling tools enable you to create and manipulate 3D objects using vertices, edges, and faces. You can start with basic shapes like cubes, spheres, or cylinders and then refine them into complex models. Utilize tools like extrude, bevel, loop cut, and more to add details and refine the shape of your models.
Modifier Stack:
Blender’s modifier stack offers a non-destructive way to modify your models. You can add modifiers such as Subdivision Surface, Boolean, Mirror, and Array to create intricate geometry and refine the appearance of your models. These modifiers can be adjusted and stacked in various combinations to achieve the desired result.
Sculpting:
Blender’s sculpting tools provide a powerful way to shape and sculpt organic forms and intricate details. Use brushes to sculpt, push, pull, smooth, and add fine details to your models. The sculpting mode in Blender offers dynamic topology, allowing you to add and remove geometry on the fly, giving you unparalleled creative freedom.
Retopology:
Retopology is the process of creating a new topology with clean and optimized geometry on top of an existing model. Blender offers retopology tools, such as the Retopology Brush and the Shrinkwrap Modifier, to help you create a new, optimized mesh that conforms to the shape of your sculpted or imported models.
UV Unwrapping:
UV unwrapping is the process of mapping a 2D texture onto a 3D model. Blender provides powerful UV unwrapping tools that allow you to create and edit UV maps for your models. This enables you to apply textures, colors, and materials accurately and precisely on your models.
Sculpting Brushes and Textures:
Blender’s sculpting mode offers a wide range of brushes and textures to add fine details and realism to your models. Experiment with brushes like Clay, Crease, Inflate, and more, and use texture brushes to create intricate patterns, scales, or skin textures. Combine brushes and textures to achieve unique effects and bring your models to life.
Procedural Modeling:
Blender’s procedural modeling capabilities allow you to create complex shapes and patterns using mathematical algorithms and rules. With tools like the Node Editor and procedural textures, you can generate intricate structures, fractals, and patterns that would be challenging to model manually.
Add-ons and Community Resources:
Blender’s extensibility through add-ons is a major advantage. Explore the vast library of community-developed add-ons to enhance your modeling and sculpting workflow. Add-ons like Hard Ops, BoolTool, and Meshmachine can streamline your modeling process and introduce advanced features and functionalities.
Blender’s modeling and sculpting features provide endless possibilities for creating 3D models with precision and artistic expression. Whether you’re a beginner or an experienced artist, Blender’s powerful tools and flexibility will enable you to bring your ideas to life in stunning detail.
In the following sections, we will delve deeper into advanced modeling and sculpting techniques, texturing, lighting, and other aspects of Blender’s workflow. Prepare to unleash your creativity and master the art of 3D modeling and sculpting with Blender.
Conclusion
In conclusion, Blender stands as a powerful and versatile 3D creation suite that empowers artists, designers, and enthusiasts to bring their ideas to life in the world of 3D. With its extensive range of features, intuitive interface, and a passionate community, Blender has established itself as a go-to software for 3D modeling, animation, rendering, and more.
Blender offers a comprehensive set of tools and capabilities, including mesh modeling, sculpting, animation, physics simulations, compositing, and video editing. Its flexible workflow allows for customization and automation through Python scripting and a vast library of add-ons. Whether you’re a hobbyist, a professional, or a student, Blender provides an accessible and powerful platform to explore your creativity and push the boundaries of 3D design.
Blender’s commitment to open-source development fosters continuous innovation and improvement. Its active community contributes to its growth, providing extensive documentation, tutorials, and forums for learning and sharing knowledge. This collaborative environment makes Blender an inclusive and supportive platform for artists of all levels.
Furthermore, Blender’s compatibility with various operating systems and its ability to handle a wide range of file formats make it a versatile tool for cross-platform projects and collaborations. Its real-time rendering capabilities, advanced simulation tools, and integration with industry-standard pipelines further enhance its appeal in professional settings.
Whether you’re creating stunning visual effects for films, designing characters and environments for games, or exploring 3D artistry, Blender offers the tools and resources to unleash your creativity and turn your ideas into reality. With Blender, the possibilities are endless, limited only by your imagination.
In the following sections, we will continue to explore the various aspects of Blender, diving deeper into specific features, techniques, and workflows to help you unlock the full potential of this remarkable 3D creation suite. Join the vibrant community of Blender users and embark on an exciting journey of artistic expression and limitless possibilities with Blender!